Using ForwardMX with DigitalOcean is one of the original use cases that we built the service for.
In this knowledgebase article, we will go through the whole setup to use ForwardMX as your MX server and receive all your domains emails while using DigitalOcean as DNS provider. Now let’s get started.
We assume you already have setup your domain with DigitalOcean.
If that is not the case, check out this guide by DigitalOcean.
1. Go to your DNS settings
Open DigitalOcean and switch to the domain you want add ForwardMX to.
2. Add MX Records
On the DNS panel, click the "More" dropdown and choose "Delete" for any existing MX records that may be configured on your domain.
You'll need the MX Records for your ForwardMX service, which you can find under "MX Records and Setup Instructions" in your ForwardMX account.

In the "Create new record" section, select MX, set the name to "@" and the Mail server to "mx1.forwardmx.net" with Priority 10, then click "Save".
@ means your domain's top level in DigitalOcean's DNS configuration.
If you add any other value here, the email would be only working on a subdomain.
For example, if you enter www instead of @, it will be only be for emails sent to [email protected] which is probably not what you want.
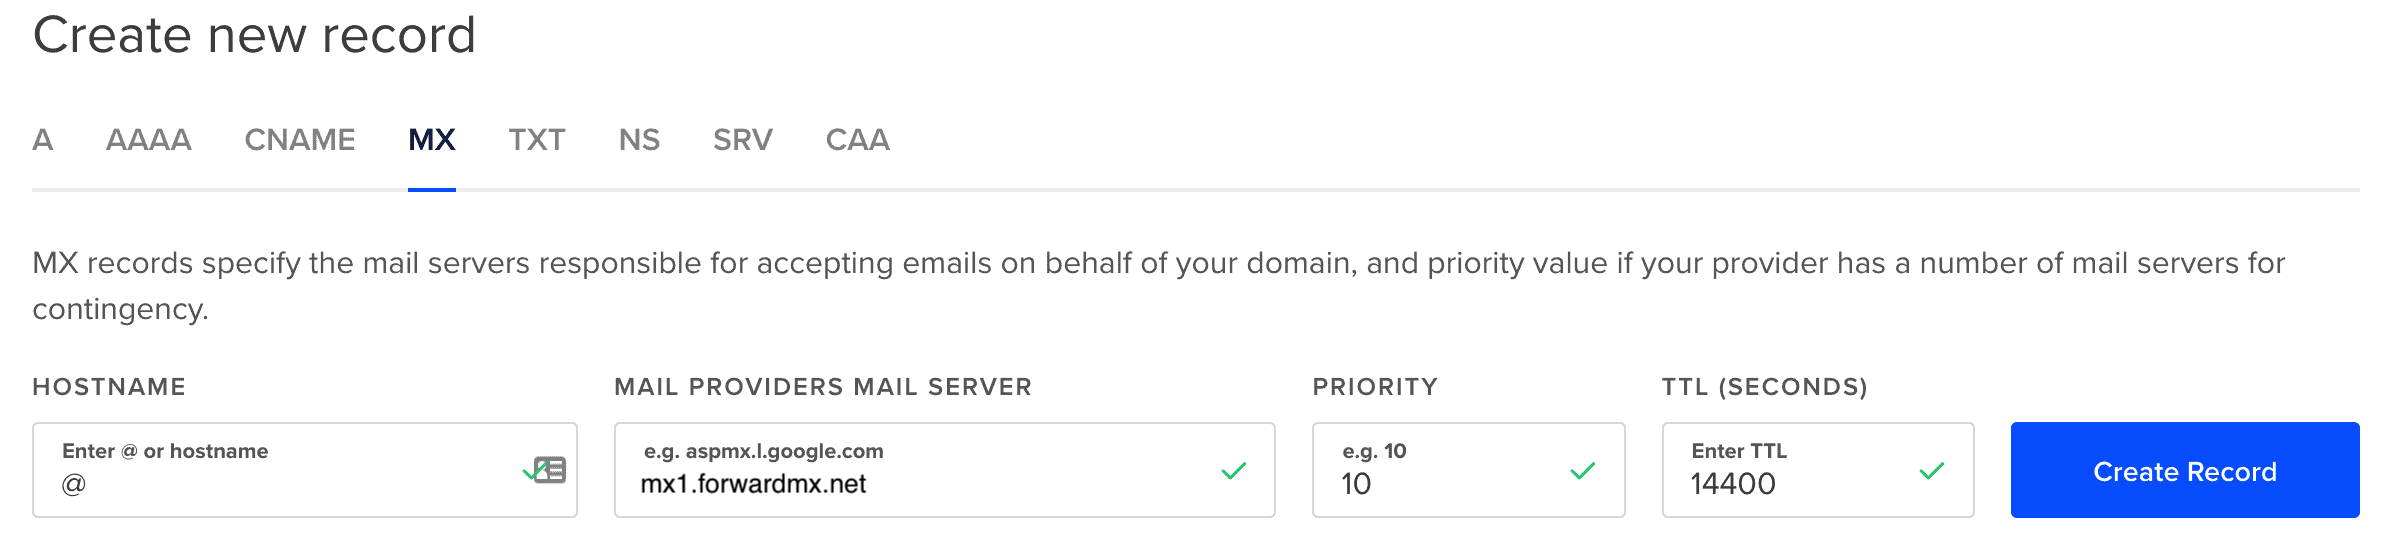
Repeat that step for the second mail server record.
3. Configure the TXT record
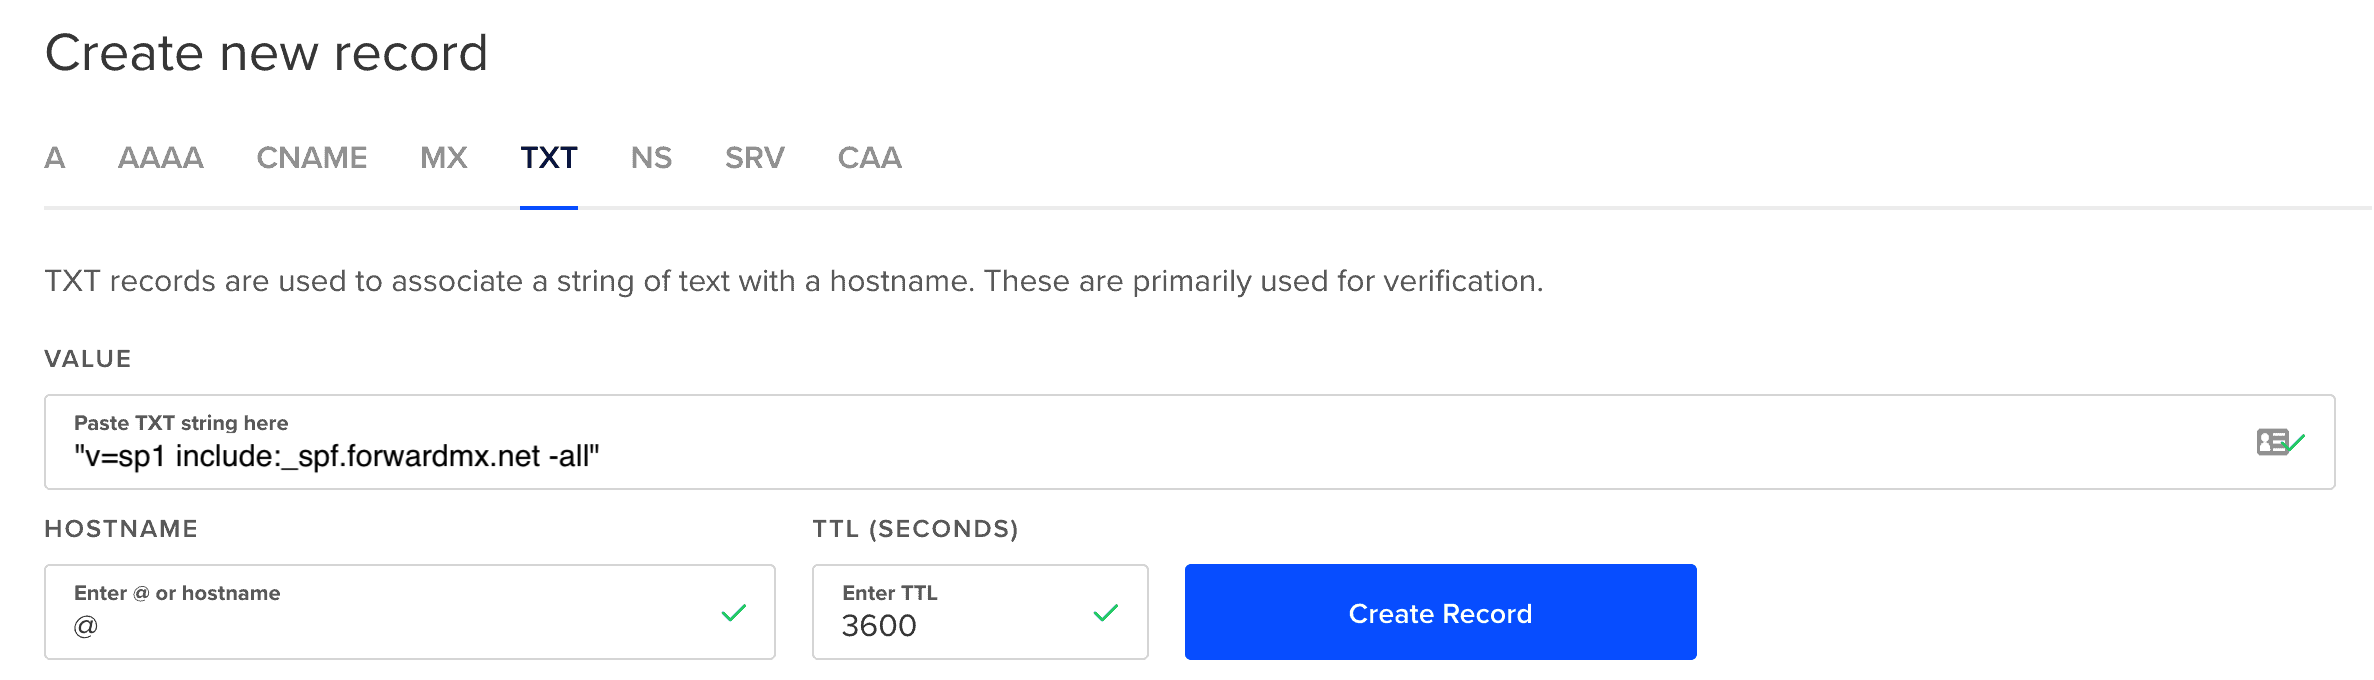
Click on type "TXT" in the "Create new record" section, set the name to @ (unless you're configuring email on a subdomain) and the value:
"v=spf1 include:_spf.forwardmx.net -all"
And then click "Save"
4. Done
If everything is right it should look something like this:

Now wait for DNS propagation for these changes, which can be as quick as 5 minutes and as long as 48 hours, and you are ready to receive emails on your DigitalOcean domain through ForwardMX.
